← Todos los tutoriales
Copia de seguridad en Azure Storage con Iperius
Iperius es una solución de copias de seguridad versátil y potente. Entre sus múltiples opciones para realizar copias de seguridad en línea, también incluye la plataforma en la nube Microsoft Azure.
Además de ahorrar en Azure Storage, Iperius admite los principales servicios de almacenamiento en la nube disponibles, como Amazon S3, Google Drive, OneDrive y Dropbox (así como cualquier otro almacenamiento compatible con S3, como Wasabi, Backblaze, IBM Cloud Object Storage, Aruba Cloud, etc.).
En esta guía, descubriremos lo fácil que es realizar una copia de seguridad remota en Azure Storage.
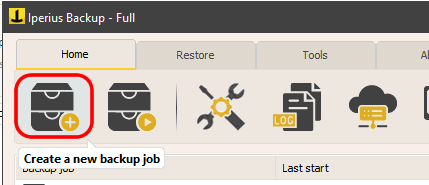
Desde la ventana principal del programa, cree una nueva operación de respaldo:
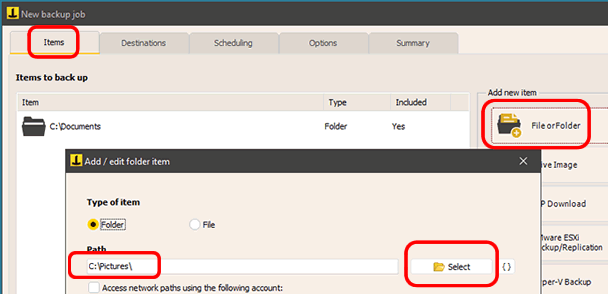
Seleccione los archivos y carpetas que desea guardar en Azure Storage:
Para habilitar Azure Storage, debe registrarse en Microsoft Azure y acceder a la consola de administración ( https://portal.azure.com/#home ). Aquí puede activar el servicio “Almacenamiento”, crear contenedores para sus archivos, cargar y administrar datos mediante una interfaz intuitiva. Para que Iperius pueda transferir archivos al espacio en la nube de Azure Storage, debe obtener códigos de acceso siguiendo el procedimiento que se muestra en las imágenes a continuación.
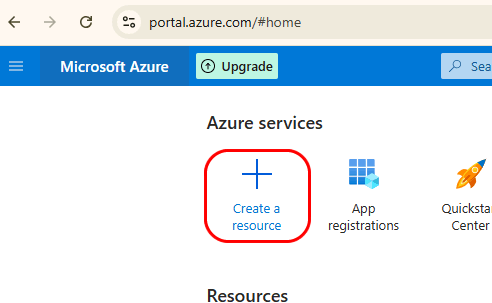
Comience haciendo clic en el botón para agregar un nuevo recurso:
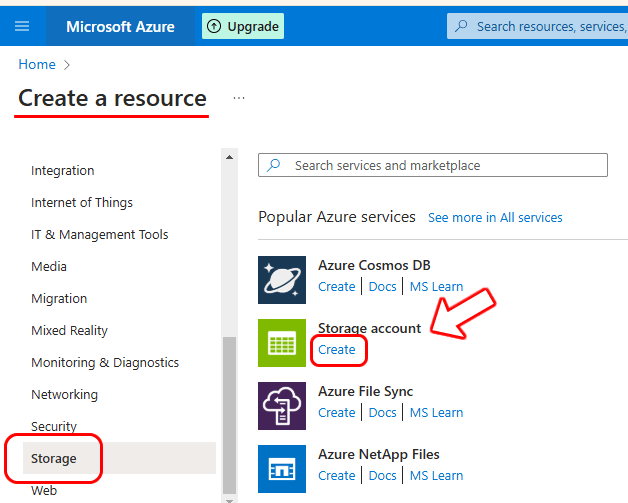
En la página siguiente, seleccione el tipo de recurso “Almacenamiento” en el menú de la izquierda y luego haga clic en el enlace para crear una cuenta de almacenamiento, como se muestra en la siguiente imagen:
Cree una cuenta de almacenamiento completando todos los campos obligatorios, como se muestra en la imagen a continuación.
Debe asignar un nombre a la suscripción y seleccionar un grupo de recursos (puede crear uno nuevo fácilmente). A continuación, asigne un nombre único a la cuenta de almacenamiento (nombre de la cuenta de almacenamiento): este nombre debe ser globalmente único, como un nombre de dominio.
A continuación, puede seleccionar la región donde se almacenarán físicamente los datos al subirlos a Azure. Por supuesto, es preferible elegir la región lo más cercana posible a la ubicación geográfica desde donde se subirán los datos para lograr la mayor velocidad de subida y la menor latencia.
The last two options affect both performance and reliability, as well as the cost of storage. You can choose to enable Premium mode for lower latency, or opt for geographically redundant storage, meaning the data will be automatically duplicated across multiple Azure regions for maximum availability. Generally, you can leave it in standard mode with local redundancy to keep costs lower, as the reliability is already very high.
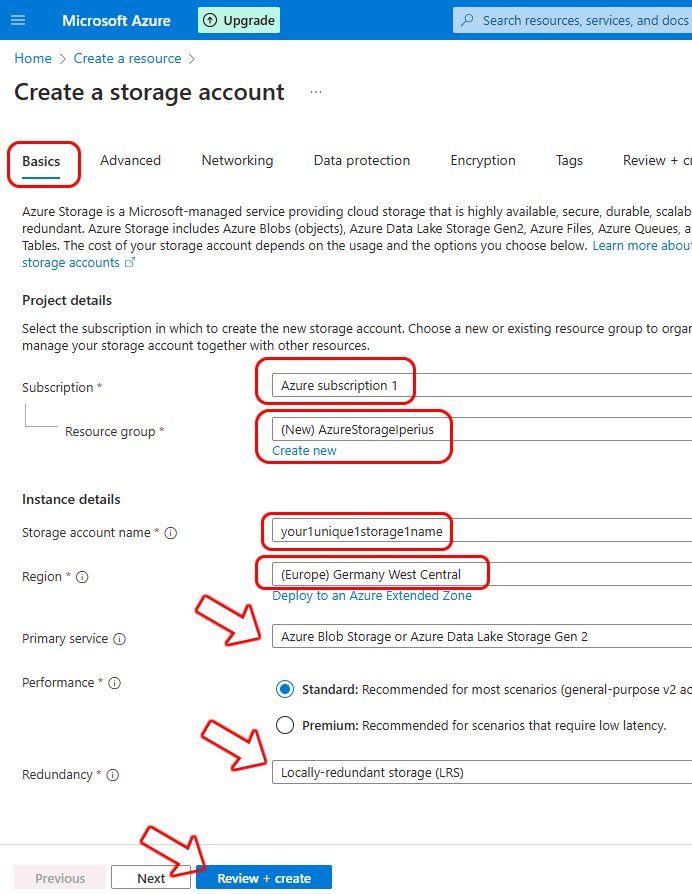
You can leave the default options in the other panels and proceed by clicking “Review + Create” to create the storage.
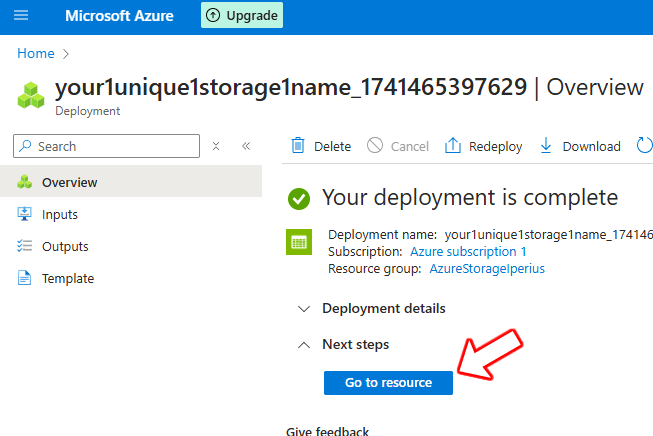
Once the storage creation is complete, you can retrieve the access keys for integration with Iperius.
Click the button to go to the resource you just created, as shown in the image below:
In the resource properties, click on “Access keys” under the “Security + networking” section in the left menu.
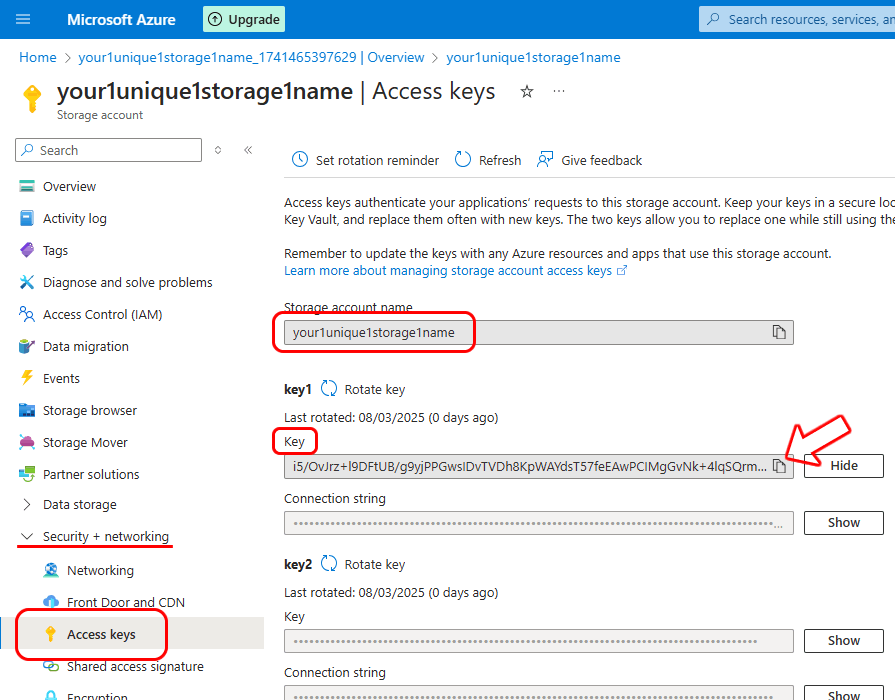
Here, you can find the storage account name (the username to enter in Iperius) and the key (the password to enter in Iperius). Click the appropriate button to show the key and copy it.
Now that you have the credentials for your Azure storage space, you can add a cloud destination in Iperius Backup by creating a new account for Microsoft Azure, as shown in the image below:
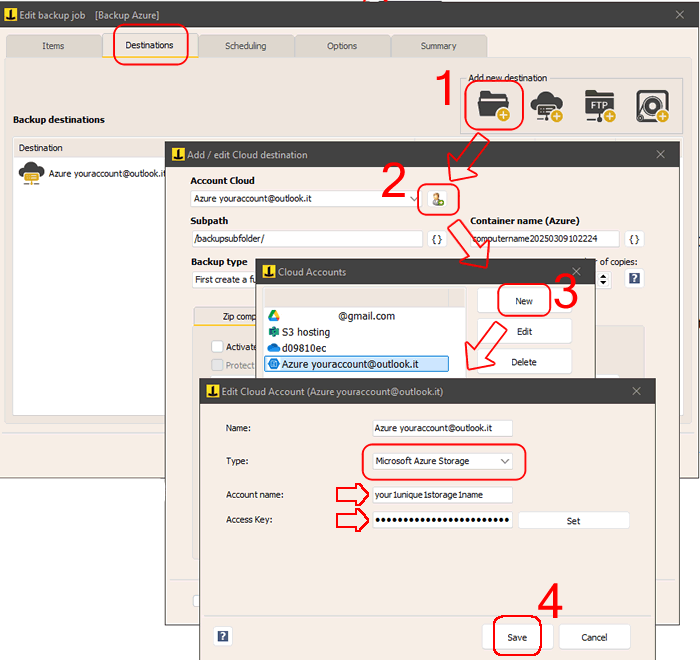
Once the connection account for Azure storage is created, there are a few other important configurations you need to make for the cloud destination.
Container Name: The container is the primary container for files and folders (similar to Amazon S3’s bucket), and its name can only consist of lowercase letters, numbers, and the symbol “-” (hyphen). For more information on naming conventions for containers, visit this Microsoft page: https://learn.microsoft.com/en-us/rest/api/storageservices/naming-and-referencing-containers–blobs–and-metadata.
Subfolder: You can specify a subpath where to save the files.
Backup Type: You can specify whether to create a full backup or an incremental or differential backup and specify the number of copies to keep.
In the panels below, you have the option to specify many options, including zip compression (with AES 256-bit password protection) and synchronization.
Finally, save the cloud destination configuration by clicking “OK.”
Next, we can set up the automatic backup schedule and email notifications to stay informed about the status of the operations.

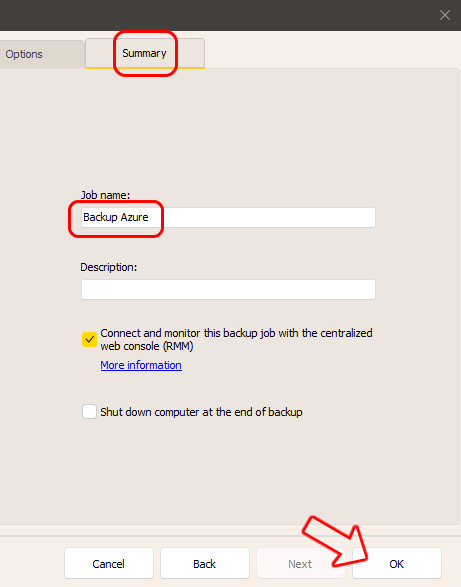
Finally, enter the name for the backup operation and confirm by clicking the “OK” button.
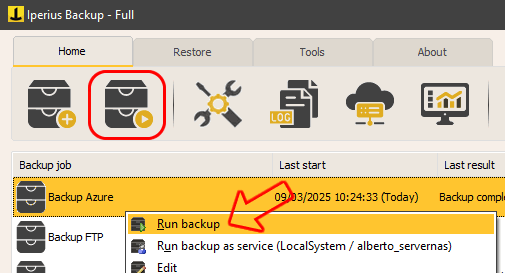
Once the new operation is created, you can start it by right-clicking and selecting “Run backup.”
Gracias al backup en Azure, podemos garantizar la seguridad e integridad de nuestros datos almacenándolos en una ubicación remota a salvo de fallos o virus ransomware, incluso con la protección que ofrece el cifrado AES de 256 bits y el protocolo HTTPS.
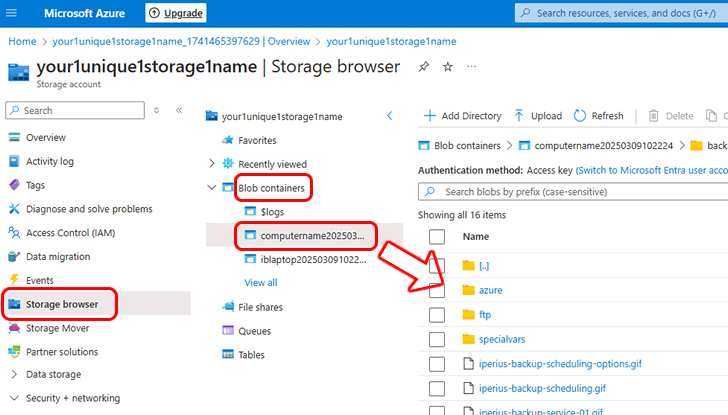
Una vez completada la copia de seguridad, puede ver inmediatamente los archivos en Azure Storage mediante el navegador dedicado disponible en el portal de Azure:
Para cualquier pregunta o duda sobre este tutorial,
Contáctanos