← Todos los tutoriales
Restauración de una copia de seguridad de imagen de unidad (recuperación del sistema) con Iperius
Con Iperius, puede crear un disco de recuperación (USB o un archivo ISO para grabar) que contenga el sistema de arranque Iperius Recovery Environment® , que le permite arrancar una máquina y restaurar una copia de seguridad de imagen de disco creada con Iperius (archivo .VHD o .VHDX). Esta funcionalidad le permite realizar una restauración desde cero, una verdadera recuperación ante desastres incluso en hardware diferente , sin la necesidad de ningún disco de instalación de Windows, solo el disco de recuperación de Iperius. Para aprender a crear una unidad de recuperación, lea el tutorial dedicado . Ver también: Copia de seguridad de imagen de disco, clonación de disco y P2V con Iperius Una vez creado el disco de recuperación, insértelo en la máquina que desea arrancar, es decir, aquella en la que desea restaurar la copia de seguridad (para arrancar la máquina desde un dispositivo USB, es posible que necesite cambiar algunas configuraciones en el BIOS o en el menú de arranque). La máquina arrancará con Iperius Recovery Environment ® y su interfaz se muestra a continuación.
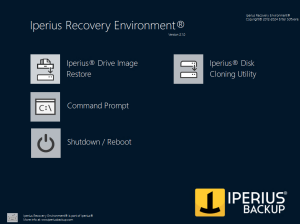
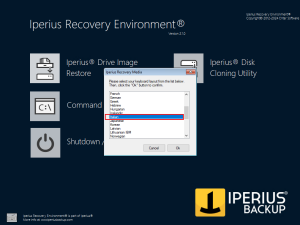
NB : Antes de iniciar la interfaz de recuperación de Iperius Backup, es importante seleccionar la distribución del teclado actual para evitar que el teclado conectado no se asigne correctamente en el software. Para ello, simplemente haga clic en el icono del teclado en la parte inferior izquierda y elija la distribución del teclado ( la predeterminada es US:US ), confirmando con el botón OK (ver la imagen a continuación).
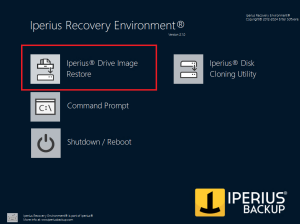
Después de configurar correctamente la distribución del teclado, puede iniciar el programa de recuperación haciendo clic en el botón “Restaurar imagen de unidad” (como se muestra a continuación):
Veamos ahora los pasos del proceso de restauración de la copia de seguridad de la imagen del disco Iperius.
1) Seleccione la ruta de respaldo de la imagen de la unidad
After launching the interface, you need to select the backup path, which should contain one or more .VHDX or .VHD files (virtual hard disks) and a .idi or .idicbt file (the configuration file with the necessary information to restore a full or incremental backup). Start by choosing the type of path where the image is located, using one of the two available options (see the image below):
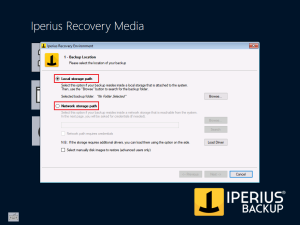
1a) Local Path: corresponds to a local path of the machine (hard drive, USB stick, or any mapped device as a drive);
2b) Network Path: corresponds to a network path accessible from the machine (NAS, shared folder, etc.);
1a) Select from a local path
Let’s start with the local path. After selecting “Local Storage Path,” click “Browse” and use the folder tree to find and select the .idi or .idicbt file present in the backup folder to restore (see the image below).
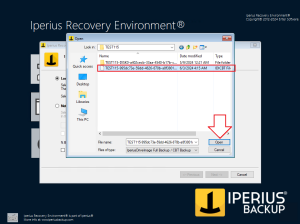
To confirm, simply click the OK button highlighted above. The path will be scanned, and if one or more backups are found, a confirmation message will appear (see the image below, right side). If no backups are found, a warning message will appear (see the image below, left side).
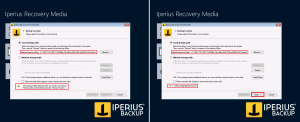
If backups were found, we can proceed by clicking “Next.”
1b) Select from a network path
If the backup is located on a network path, select “Network Storage Path” and enter the path of the folder containing the .idi file (you can also use the “Browse” button to view the network devices). Click “Search” to start scanning (see the image below):
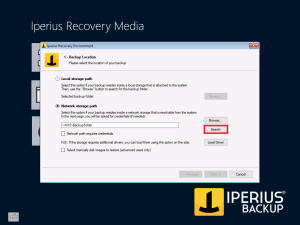
Again, after the scan, a confirmation message will appear if backups were found; otherwise, we will see a warning. The “Next” button will be enabled only if backups are found.
Setting network credentials: If the network path requires login credentials, select “Network path requires credentials” and, after clicking “Search,” enter the necessary credentials in the window that will open (see the image below).
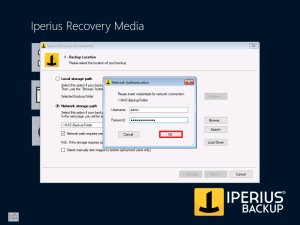
Once the correct path is selected, click “Next” to continue.
2) Select the backup to restore
One or more backups found in the selected path will be displayed (see the image below).
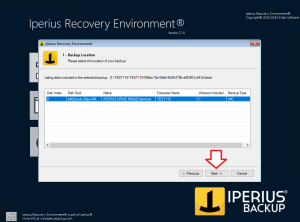
Each row corresponds to a backup, with its main information such as the backup operation name, computer name, included volumes, and backup type. Select the desired backup and click “Next” to continue. If the backup is Full or Patching, proceed to section 3. If the backup is incremental or differential, choose which version to restore.
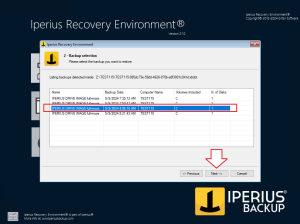
Choose the backup to restore and click “Next” to continue.
3) Select the restore mapping
En la ventana de mapeo de restauración, necesitamos asignar un disco duro a cada archivo .vhdx o .vhd de la copia de seguridad para restaurar (ver la imagen a continuación).
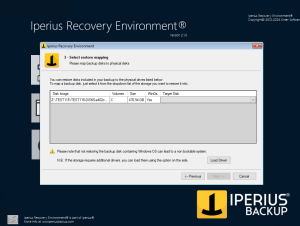
Seleccione el disco duro donde se encuentra el archivo .vhdx que desea restaurar, luego haga clic en el menú desplegable en el cuadro “Disco de destino” para elegir el disco de destino.
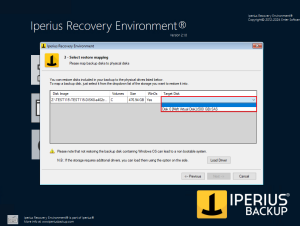
Cada archivo VHDX se escribirá en el disco físico correspondiente que hayamos seleccionado. Una vez completado el mapeo, haga clic en “Siguiente”.
4) Confirme la configuración de restauración
En la siguiente ventana, podrá ver un resumen del mapeo de restauración (ver imagen a continuación).
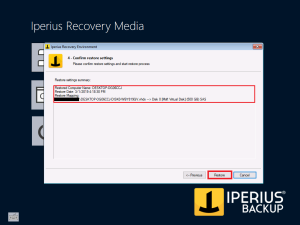
Si todo está correcto, haga clic en “Restaurar” para iniciar la restauración, o haga clic en “Anterior” para volver atrás y modificar algunos parámetros. Al hacer clic en “Restaurar” se iniciará el proceso y se restaurará el disco (ver la imagen a continuación).
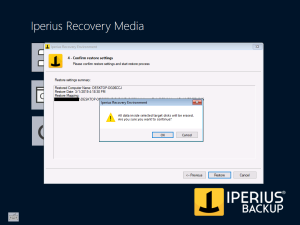
Advertencia: la restauración sobrescribirá irreversiblemente el contenido del disco físico de destino.
5) Iniciar la restauración
El proceso de restauración comenzará, primero formateando y preparando el disco y luego escribiendo la imagen (ver la imagen a continuación).
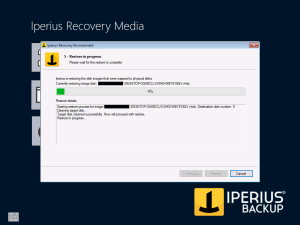
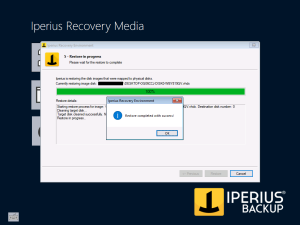
Una vez finalizado el proceso, haga clic en “Aceptar” y luego en “Finalizar” para finalizar el procedimiento.
6) Reinicie el sistema
Por último, haga clic en el botón “Apagar/Reiniciar” y seleccione “Reiniciar”. Retire el dispositivo o disco USB desde el cual se inició Iperius Recovery Environment y confirme con “Aceptar”.
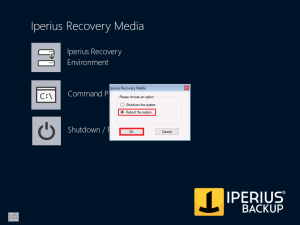
La computadora se reiniciará y arrancará desde el disco restaurado.
Para cualquier pregunta o duda sobre este tutorial,
Contáctanos